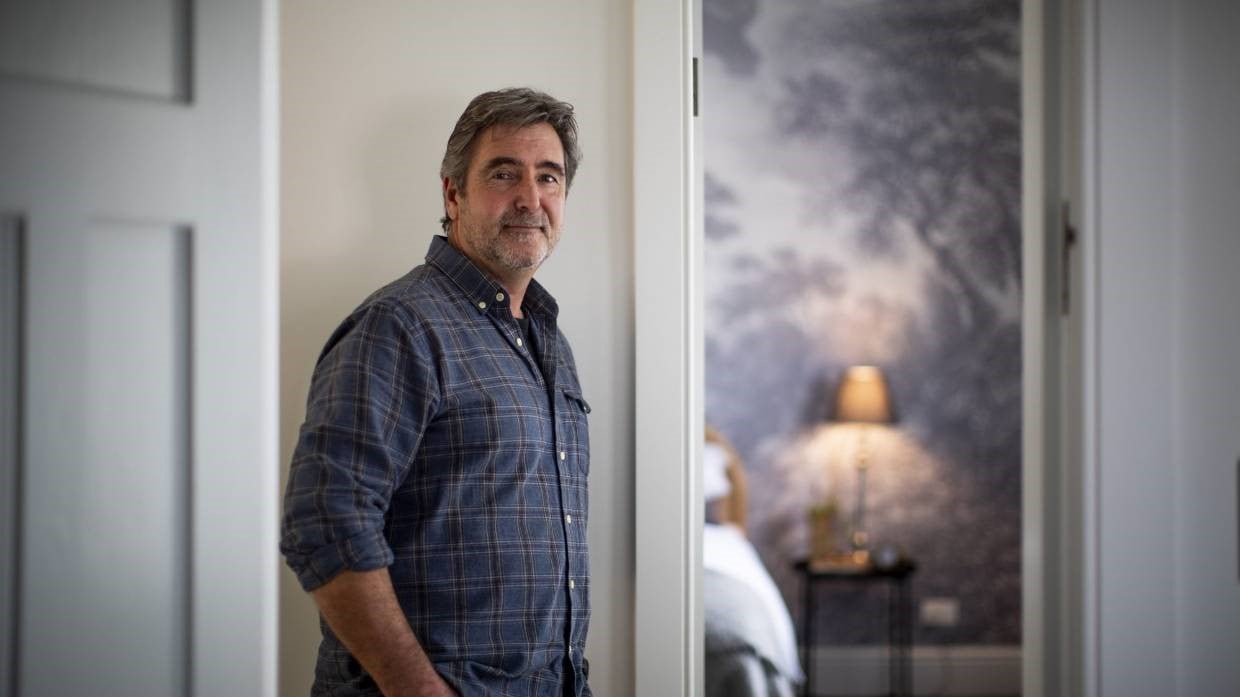
If you talked to Peter Wolfkamp about his latest renovation, The Huis Project, you’d be surprised how smoothly he talks about the re-build process.
You might think he ran into some good luck - but luck had nothing to do with it. Peter’s thorough planning and preparation ensured that most things ran to plan and there were no nasty, last-minute surprises threatening to derail the project.
When it came to the fireplace installation, this was no different. We caught up with Peter to learn more about the fireplace renovation and have him talk us through exactly what was involved in the process.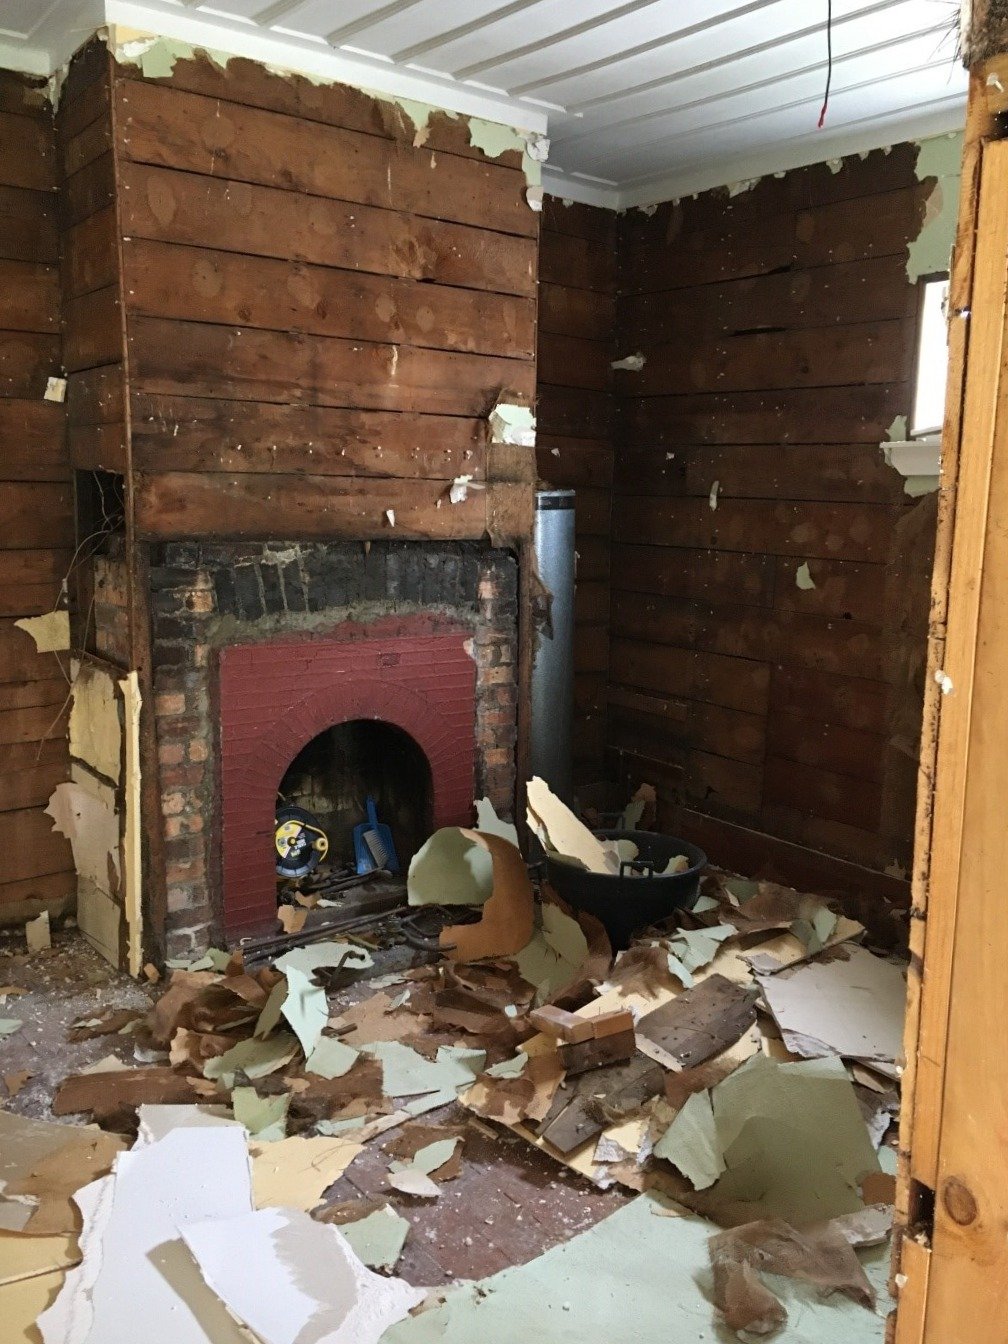
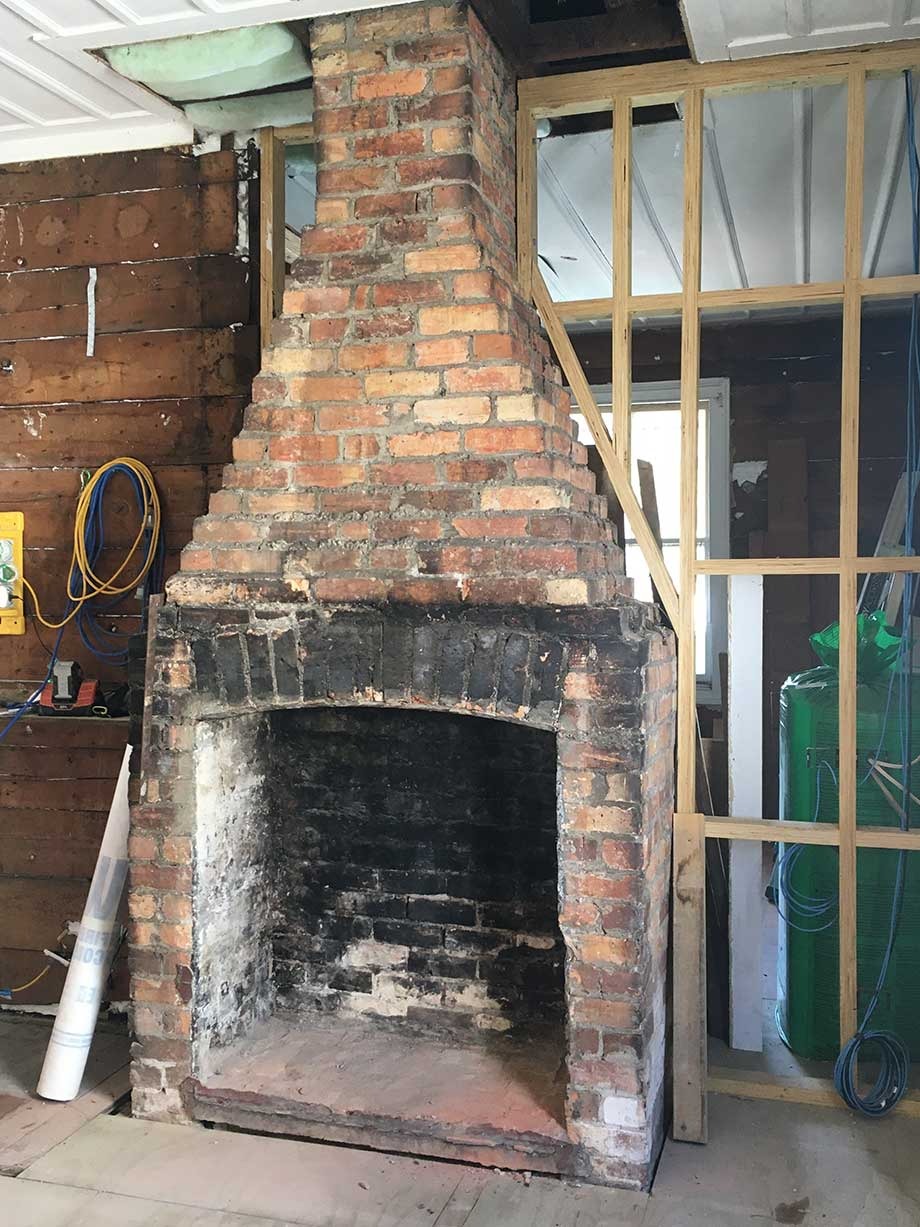
1. Demolition
- The first stage of the process involved removing all the existing cladding around the fire to reveal the original fireplace surround and brickwork.
Peter explained that the fireplace was probably originally built to accommodate a cast-iron stove, which was typical of bungalows in that era. Then at some stage decades later, this would’ve been removed and converted into an open wood fireplace.
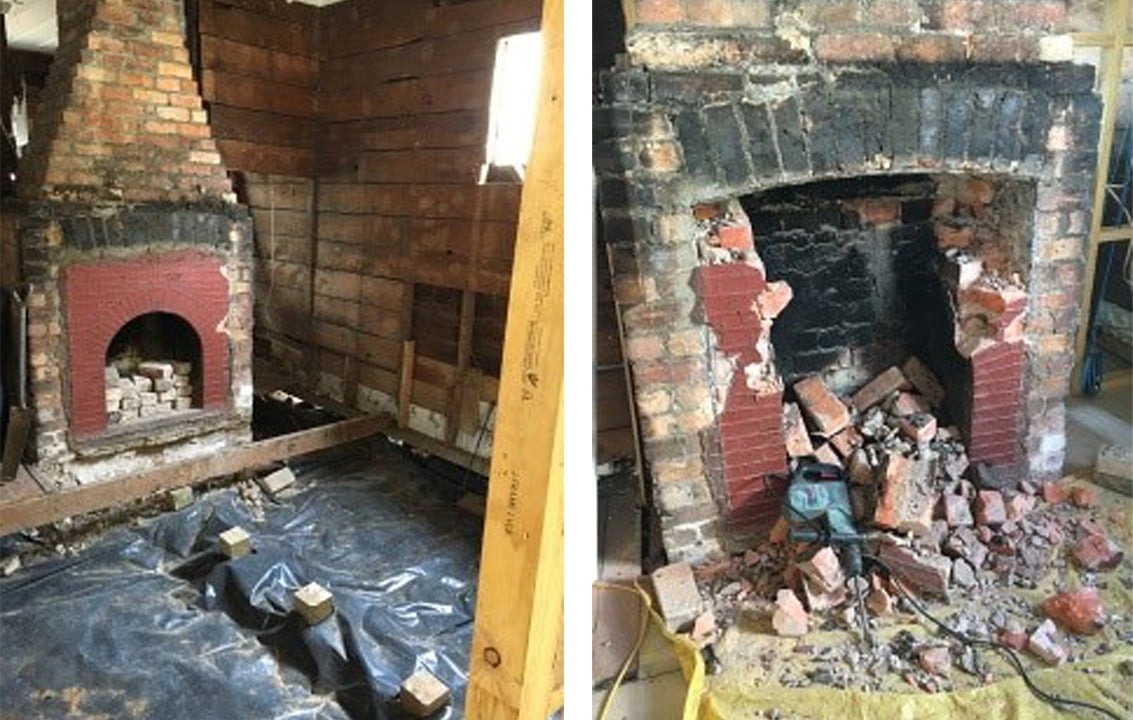
- Peter then removed some bricks inside the opening which would’ve been added when it was converted to an open fireplace. He was then left with the original large, square opening
2. Planning
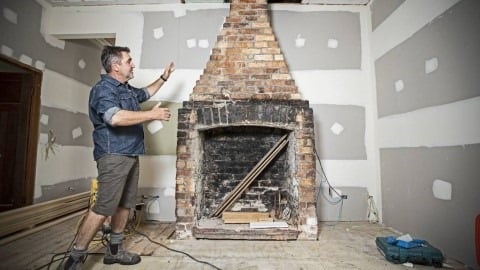
Once the fireplace had been exposed to reveal the original brickwork, Peter and his wife Debbie fell in love with the character, so they decided to restore the surround.
- They got in touch with their local Escea dealer, Stoke Fireplace Studio, to arrange an on-site visit. Stoke was then able to assess the original fireplace and establish if it was suitable to retrofit a new, sealed gas fireplace into the existing opening. Because the fireplace was in good condition, Peter got the go ahead from Stoke to install a new gas fire.
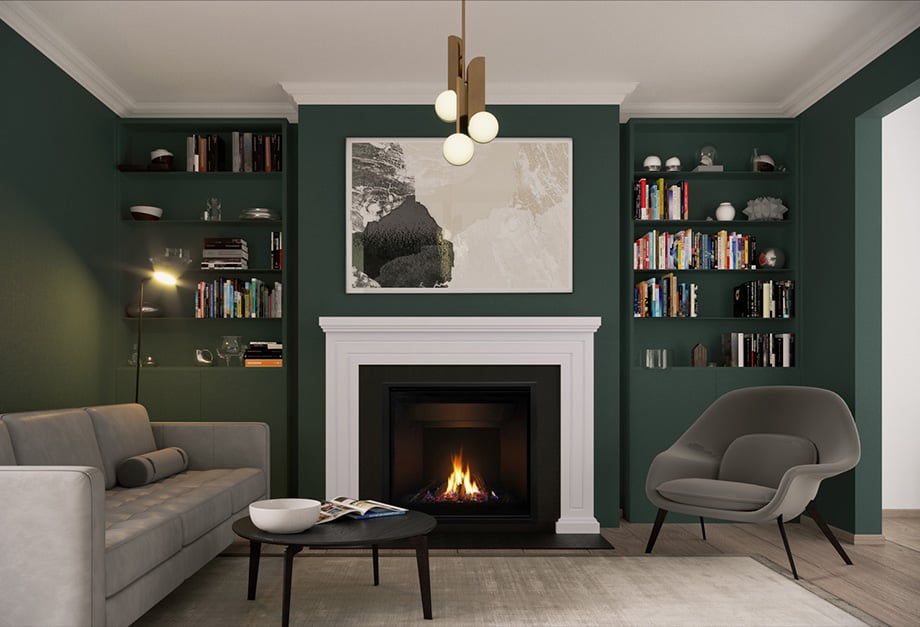
- When it came to choosing a particular fireplace model, Peter chose the new Escea DF990 gas fireplace; the DF990 was large enough to fit into the opening and most importantly, it was retrofittable and easily to install into existing cavities like this. Learn more about why Peter chose the DF990 here.
- Once they had chosen the fireplace model, Stoke undertook a thorough check of the site to work out what Peter needed to do in preparation for the fire installation. This included making sure that the fireplace opening was the right size for the DF990 to fit; the power, gas and ethernet cable connections were put in place, the existing chimney was in good, clean condition and the chimney would fit the new flexible flue.
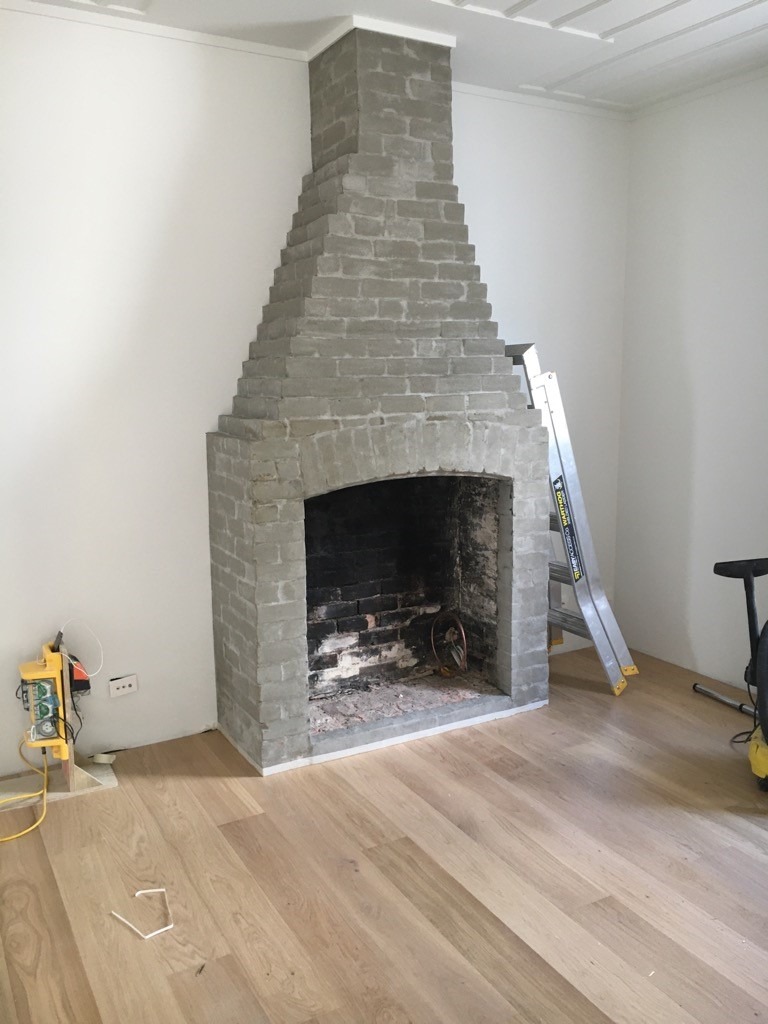
3. Preparation
Peter then set to work to ensure all prep work would be complete in time for install day.
- In order to make the cavity the right size for the fire, Peter boxed out some framing inside the opening. He also levelled out the base of the fireplace to ensure the fireplace would sit straight and at the required height.
- He organised for the chimney to be swept, just to make sure that there was no blockages that would restrict the new flue being installed.
- Stoke arranged for the gas fitter and electrician to connect the gas line, power and ethernet cable in the fireplace opening.
- They found that the chimney opening was larger than the cowl so Peter worked with Stoke to create a custom flashing. The new flashing would ensure no water or debris would get inside the cavity.
- To modernise the original orange bricks, Peter cleaned and finished the surround with a coat of Resene Rock Coat – a raw render-style finish.
4. Installation
When it came to installation day, Peter’s planning enabled the gas fitter to install the fire within just a couple of hours, and without a hitch.
The opening was the right size which meant the firebox fitted perfectly, the flue was clear which meant the flue could easily run straight up the chimney and the custom flashing was made and ready to be installed over the cowl. 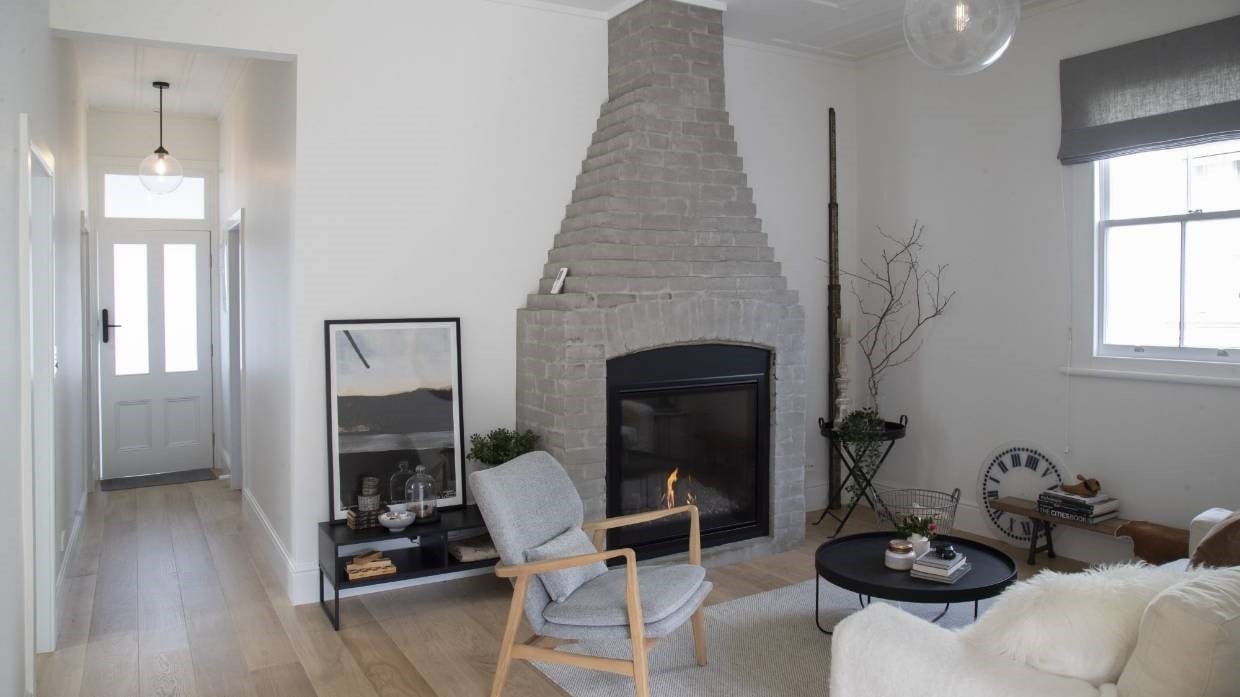
The finished fireplace is a testament to Peter’s thorough approach and careful consideration to detail and planning. By taking time at the start to plan and prepare, the renovated living room not only looks great, is warm and efficient, the new tenants can feel confident knowing they’ve live in a new home that’s truly well-built from the inside, out.